ESPWeb: Creating & Using Virtual Samples
In this guide you will learn how to create virtual samples and apply them to products. To begin, use the menu below.
-

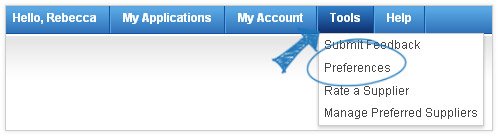
To access the Preferences, click on the Tools button and then select Preferences.
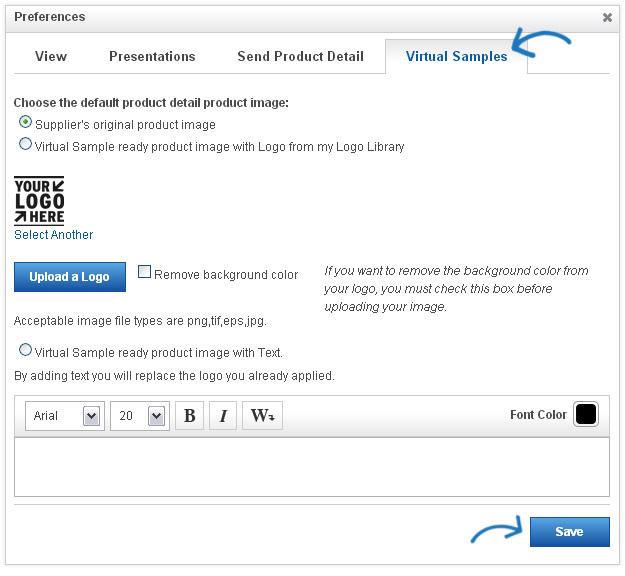
 Virtual Samples Tab
In ESP Web, you can add a custom logo to any virtual sample-enabled product found on ESP Web.
There are two ways to add a logo to a product. One way is to upload the logo to the Image Library and apply so it appears on all virtual sample-enabled products. Another way is to apply a logo to just a single product
-

Click the radio button for "Virtual Sample ready image with Logo from my Library," then click the "Upload a Logo" link. It is important to check the "Remove background color" checkbox first before uploading.

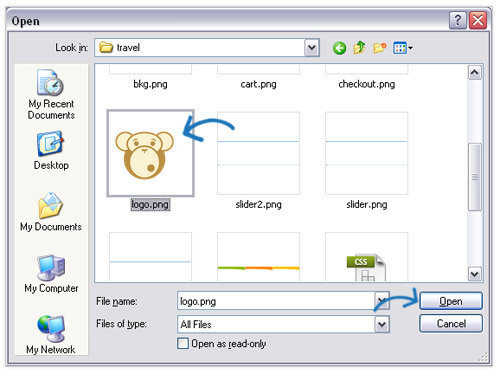
The File Upload dialog box appears. Navigate to your logo, select it, and then click Open.
- Note: The file upload window and process looks differently on a MAC.
The logo appears in the Preference window. You can use the "Select Another" link to use a different logo from your Media Library.
If you do not have a logo, you can also select to use text and type your text in the available text box.
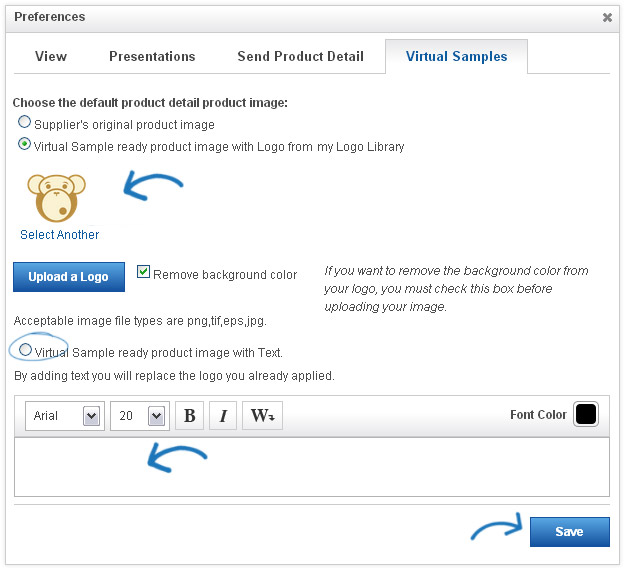
Click on Save to save these changes. You will then see a green bar confirming that your changes have been saved successfully. Close the window.
Now, the applied appears on virtual sample-enabled products on the product detail page.
- Note: Virtual Samples will only display in the Details View.
-

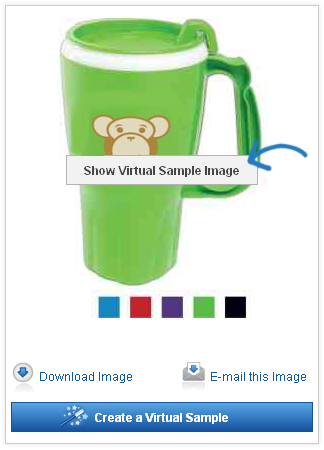
You are able toggle between the catalog image and the custom logo by hovering your cursor over the image. A link to "Show Virtual Sample Image" will appear. Click on the link to view your virtual sample image.
When you are viewing the virtual sample image, the button will change to "Show Catalog Image" which enables you to view the supplier image.
-

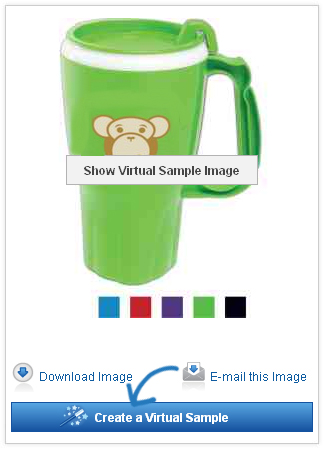
Another way to do a Virtual Sample is to create them one by one. To do this, click on the Create Virtual Sample link below the image on the Details page.
The Virtual Samples window will open.
You can add a logo to the product, select a imprint method, manipulate the location of the logo, or add text to the product if there is not a logo. To use an image from the Media Manager, use the "My Logos" link.
The logo appears on the product. You can resize the logo by moving the slider to the left or right. You can also use the arrows to move the location of the logo.

 Click here to see a demo of how to create a blank image.
- Note: The image appears in the suggested imprint area and by you may lose parts of the image if you move it outside the virtual boundary. The button with the dot will re-center your logo within the virtual boundaries.
If you don't have a logo or image, you can use the text field to add a company name or other identifier. The system allows you to select a font type, size, style and color. Click Apply to add the text and it will appear on the product.
You are also able to change the imprint method. On the right hand side, there is a dropdown menu with all of the available imprint methods for the product.
To select an imprint method, click the dropdown arrow to display a list of printing modes such as full color, embossed, embroidered, etched, etc.
To create a blank product image, just click on the "Create Blank Image" button. This will remove any logo or text that was already applied to the product by the supplier.
Click Save when you are finished.