ESP Websites: Build Your Site
In this quick step guide you will learn how to build your site.
- Select A Site
- Set Up Your Site
- Upload Your Logo
- Company Info
- Template & Color, Fonts
- Advanced Options
- Intro & About Pages
- Industry News & Video
-

When you are initially creating your site, you can use the site builder and quick launch to get your site up, active and ready for business in just a few minutes.
Click the dropdown menu in the "Getting Started" section and select your package.
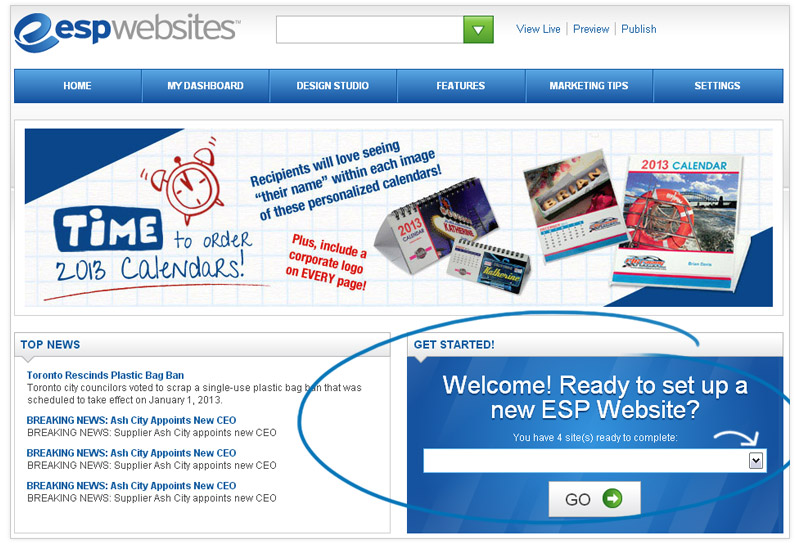
After selecting your package, click on Go.
-

-
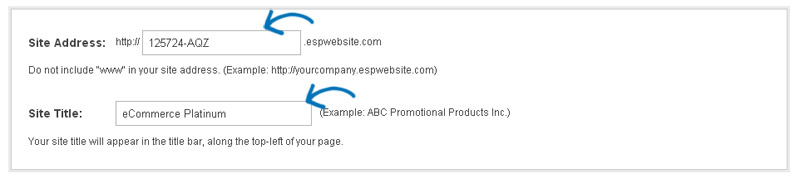
Set Up Your Site
In Section A, Set Up Your Site, you can create your site address (domain name) and site title in the "Set up Your Site" Section. Do not include spaces, "www." or ".com" in the site address. Use proper spacing and capitalization in the Site Title.
-

-
Upload Your Logo
In Section B, Upload Your Logo, you can add your company logo by clicking the "browse" button in the "Upload Company Logo" section.
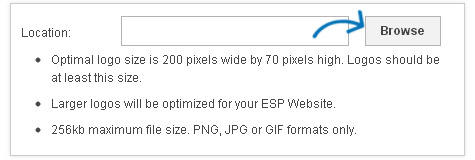
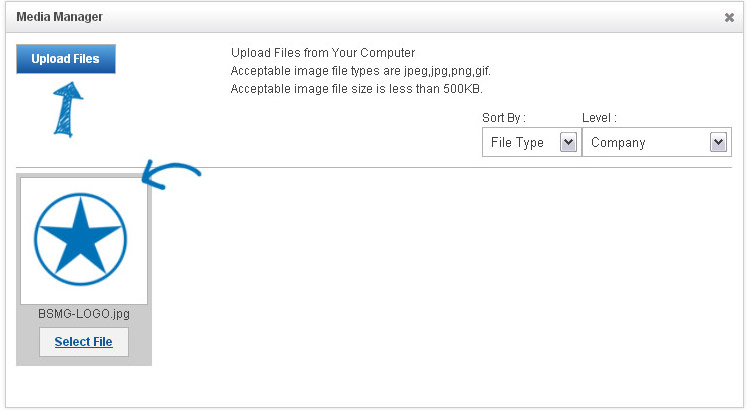
The Media Manager will open and you can select an image.
If the image you would like to use is not yet in the Media Manger, click on the "Upload Files" button and browse your computer for an image.
You will see a preview of your image in the Logo Preview window.
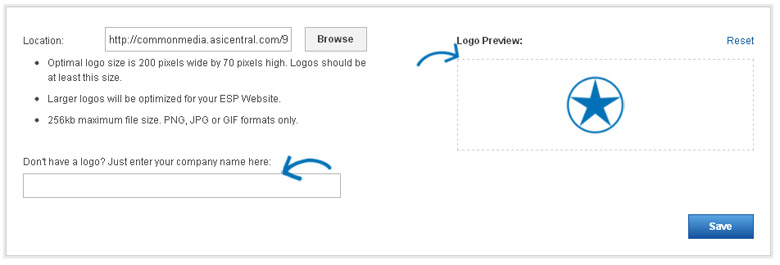
If you do not have a company logo, type your company name into the last field in this section. A preview of your typeset logo will appear in the Logo Preview window.
Click Save when you are finished.

What's Covered:
-
Company Information
In Section C, Company Info section, you can enter your company information, such as your Company name, address, and contact information.
Enter Your Company Info
There is a dropdown for available addresses, which will enable you to use an address entered by any user in your company. Select an address or enter your information, and then use the checkboxes to select which information you would like to display live on your site.

After you have finished making changes, click on the Save Address button in this area.
- Note: You must enter a phone number and email, even if you choose not to display them on your site
-
Company Social Networking Links
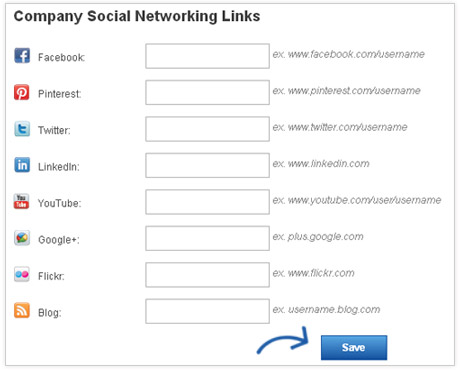
The last section in the Info tab is the Company Social Networking Links area.
In the Company Social Networking Links area, you can copy and paste links into appropriate fields. You can add links for:
- YouTube
- Google+
- Flickr
- Your blog
Click on Save after entering the URL
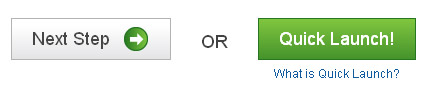
Quick Launch
At this point, if you feel you are ready to get your site up and running, click on the Quick Launch button. A preview of your site will open. If you are not ready to Quick Launch continue onto the Next Step in this guide.
In the upper right corner of the preview, there is the Publish button. The Publish button will make your site available to the world.
If you would like to make further customizations to your site before launching it, click on the Next Step button.
-

What's Covered:
-
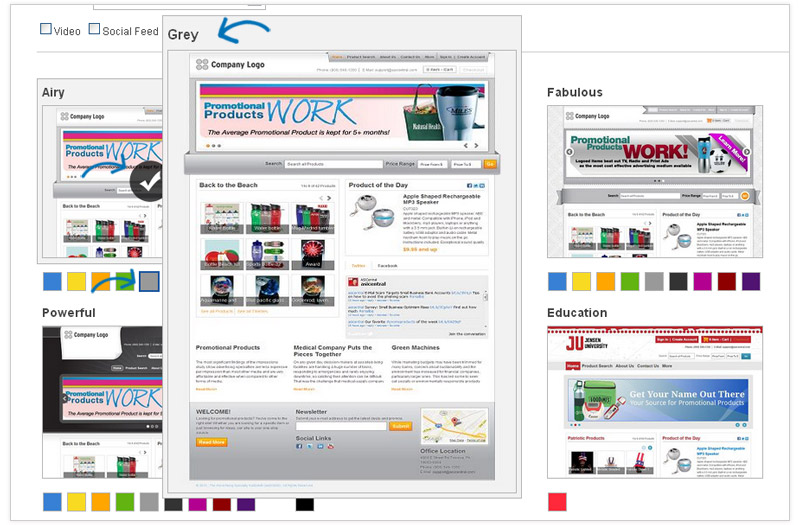
Template & Colors
In Section D, select a Template & Color, there are many templates available, each sporting a variety of features and colors. To find just the right template for your company, you can use the "Narrow Template Selection" to select a template that has the features you would like.
Narrow Template Selection
Use the dropdown in the "Narrow Template Selection" section to select the size of the logo you would like to have: Traditional or Large. Then, choose the template type: All or Industry. Next, check the box next to video, social feed, Google map and left navigation for each feature you would like to have included on your site.

Template Preview and Colors
Each template has preset color schemes available. To preview the template in any of the color schemes, simple hover over the color swatch. The template you have selected is indicated by a large check mark.
Click here to see a demo!
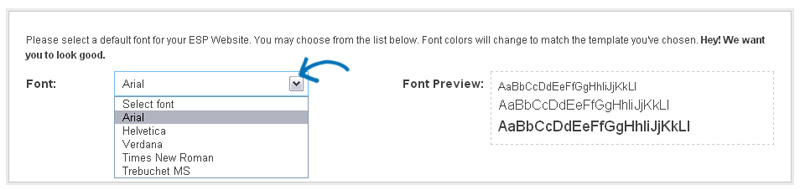
Choose Your Font
In Section E, Choose Your Font, you can use the dropdown to select the font you would like to use on your site.
-

What's Covered:
-
In Section F, Advanced Options, you are able to customize your ESP Website with different home page content including: Banners, News and Video, Newsletter Signup and Product Collections.
Banners
Banner Options
The Banners area enables you to select from three options:
- I don't want to select banners. Let the system select for me
This option will enable your ESP Website to automatically select the banners that will be displayed on your site. Use the dropdown to select Large Banner or Small Banner.
- I want banners only from my preferred suppliers. Let the system select for me
This option will enable your ESP Website to automatically select banners only from suppliers that your company has designated as preferred. Use the dropdown to select Large Banner or Small Banner. For more information on managing preferred suppliers, please review Appendix B – ESP Websites Preferred Supplier Administration.
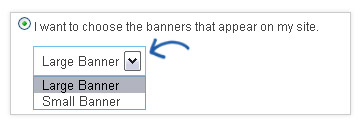
- I want to choose the banners that appear on my site.
This option will enable you to select which banners will be displayed on your site. Use the dropdown to select Large Banner or Small Banner. Then, drag up to four banners from the Available Banners, Personal Shared Banners, Personal Banners, or ASI Banners sections into the Banner Loader.
Large and Small Banners
After selecting "I want to choose the banners that appear on my site" you have the option to choose a Large Banner, or a Small Banner.
What's the difference? The small banner is 110 pixels shorter than the large banner. If you're interested in keeping your content close to the top of the page but still want to display banners this is a good option for you!
- Large Banner: 914 pixels wide x 218 pixels high
- Small Banner: 914 pixels wide x 108 pixels high
After you've selected whether or not you want to display a large banner or a smaller banner, if you don't have any banners of your own you can select and/or rearrange the banners available.
You will see the following options:
- Company Banners
- Personal Shared Banners
- Personal Banners
- ASI Banners
Selecting a Preloaded Banner
To add your banners to the Banner Loader, all you have to do is click on the banner, and drag it from the list of Available Banners into the Banner Loader. Click here to see a demo of this really nifty feature in action! After you have added up to four banners, you can re-order them in the banner loader. There are two ways to do this:
- Drag and drop the banners into order by clicking on the plus symbol (located in the upper left corner of that banner)
- Click on a banner and then use the up/down arrows to move it to the desired position
To remove a banner from the banner loader, click on the banner and select remove.
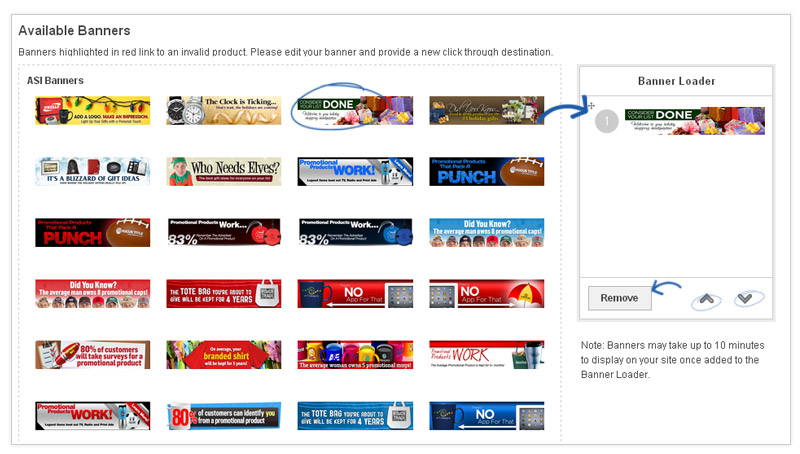
- Note: Banners may take up to 10 minutes to display on your site once added to the Banner Loader.
- I don't want to select banners. Let the system select for me
Product Collections
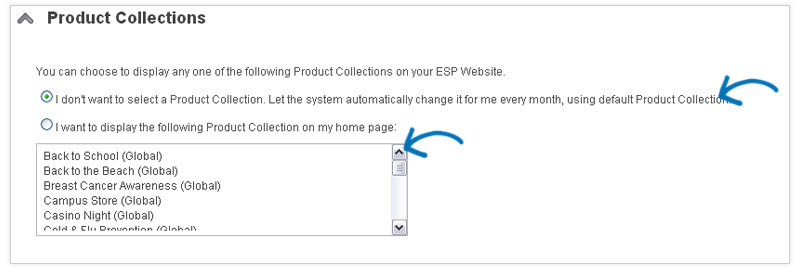
The Product Collections area enables you to select from two options:
- "I don't want to select a Product Collection. Let the system automatically change it for me every month, using default Product Collection."
This option enables your ESP Website to automatically display a new Product Collection each month.
- "I want to display the following Product Collection on my home page".
This option enables you to select the Product Collection to be displayed on your home page. Just click on the Product Collection from the available list.
- "I don't want to select a Product Collection. Let the system automatically change it for me every month, using default Product Collection."
-
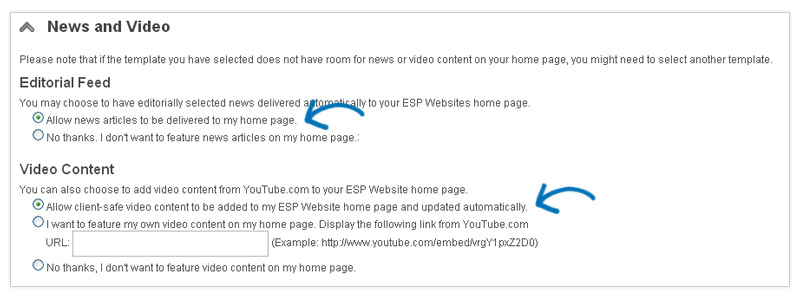
News and Video
The News and Video area enables you to select Editorial Feed and Video Content to be displayed on your site.
For Editorial Feed, there are two options:
- Allow news articles to be delivered to my home page.
- No thanks. I don't want to feature news articles on my home page
For video content, there are three options:
- Allow client-safe video content to be added to my ESP Website home page and updated automatically.
- I want to feature my own video content on my home page. This option will enable you to paste a URL to a YouTube video of your choice (ex: http://www.asicentral.com). Just type/paste the URL into the available box.
- No thanks, I don't want to feature video content on my home page.
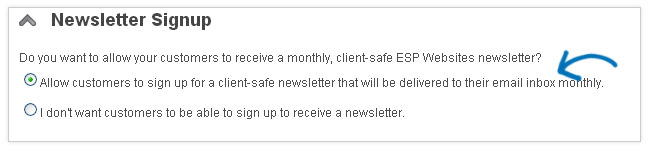
Newsletter Signup
The Newsletter Signup area enables you to select whether to allow your customer receive a monthly, client-safe newsletter from ESP Websites. There are two options in this section:
- Allow customers to sign up for a client-safe newsletter that will be delivered to their email inbox monthly.
- I don't want customers to be able to sign up to receive a newsletter.
Last Step!
When you have finished making your selections; click on the "Last Step" button.

-

-
In Section G, Introductory Text and About Us Page, you can add a headline and text to be displayed on the home page.
Introductory Text and About Us Page
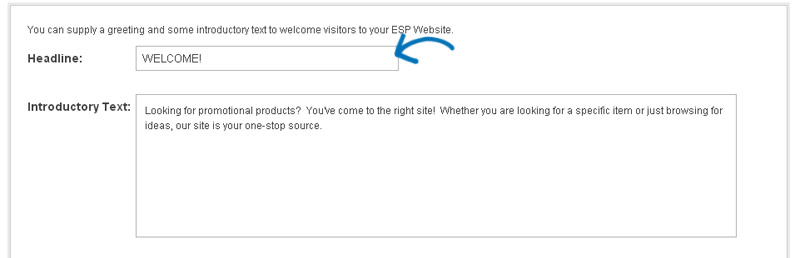
You can also customize the information in the About Us Page by typing in the About Us section.

-

What's Covered:
-
Industry News, Video and Events
In Section H, Industry News, Video and Events, you can choose to enhance your ESP Website by adding a customer friendly page of promotional industry information.
- Yes, I want to feature a page just for Industry News, Video and Events.
- No Thanks. I don't want to feature a page of Industry News, Video and Events on my ESP Website.

-
Preview and Publish
When you are finished making your selections; click on the "Preview Site" button.

The preview will open. After looking over your site, if you need to make further changes, click on the "Go Back" button or click on "Publish" if you are ready to go live.

After publishing, your site will be up, active and ready for business!