ESPWeb: Presentations, Design
In this quick step guide you will learn how to select the template, color and layout of your presentation. To begin, use the menu below.
-

In the Theme & Layout tab, you can select the layout style: portrait or landscape.
After selecting the layout style, you can scroll the themes that are available by hovering on the arrows to the left and right of the theme thumbnails. After locating the theme you would like to work with, click on the color swatch below it.
-
 Header & Footer Layout
In the next sections, you can select the Header and Footer Layouts. In the Header Layout section, you can incorporate your logo into the header of the presentation. Use the "Select from Image Library" to use a logo from the Media Manager.
You can use the Layout dropdown to select how you would like your logo and contact information to be shown.
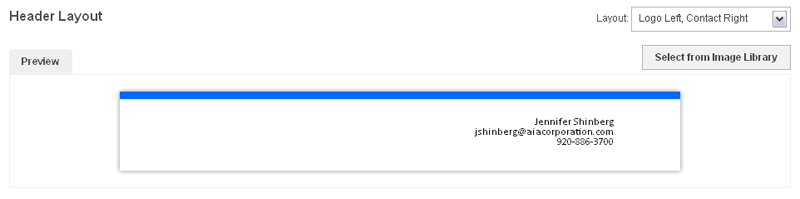
- Note: To change the contact information on the header, go to the Contact Information section.
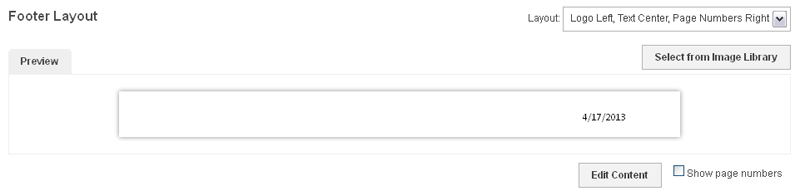
In the Footer Layout section, you can incorporate your logo into the footer of the presentation. Use the "Select from Image Library" to use a logo from the Media Manager.
You can use the Layout dropdown to select how you would like the footer to be displayed. Use the Edit Content button to customize the footer to display text, such as your web address. Check the Show page numbers box to add page numbers to your presentation.
-
Product Layout
In the next section, Presentation Layout, select from:
- 1 product per page with a large image
- 1 product per page with more details
- 2 products per page
- 3 products per page
The data fields that are the standard for each template are displayed below each layout.
-

The Create a Virtual Sample tab enables you to create a virtual sample using a logo from your logo library or with text for all virtual sample enabled images in the presentations.
If you select "Virtual Sample ready product image with Logo from my Logo Library, you can click on the "Select from Image Library" button.
 Click here to see a demo of how to create a blank image. Click here to see a demo of how to use text.
For more information about how to create a virtual sample, click here.
- Show & Hide Fields
In this section, you will see a preview of the product layout you selected. You can select which fields you would like to show by marking them. If you wanted to, you can click on the Reset to Default Fields button. You can also check the "Set As Default" to have the fields you selected automatically applied to all presentations from this point on.
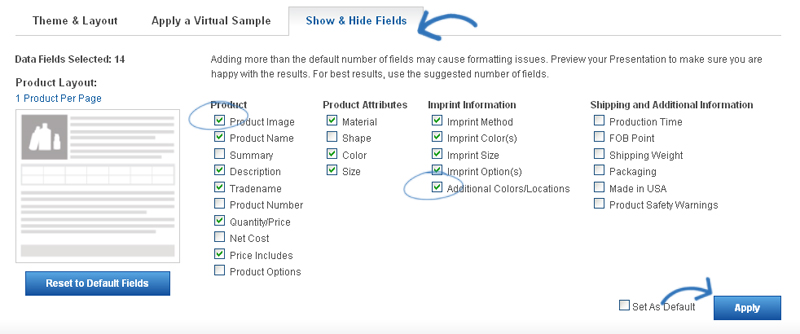
- Note: Adding more than the default number of fields may cause formatting issues.
After you have made your selections, click on Apply.
-

In this section, you will see a preview of the product layout you selected. You can select which fields you would like to show by marking them. If you wanted to, you can click on the Reset to Default Fields button. You can also check the "Set As Default" to have the fields you selected automatically applied to all presentations from this point on.
- Note: Adding more than the default number of fields may cause formatting issues.
After you have made your selections, click on Apply.