ESP Websites Design Studio: Advanced Site Navigation
In this quick step guide you will learn how to create a new menu.
-

-
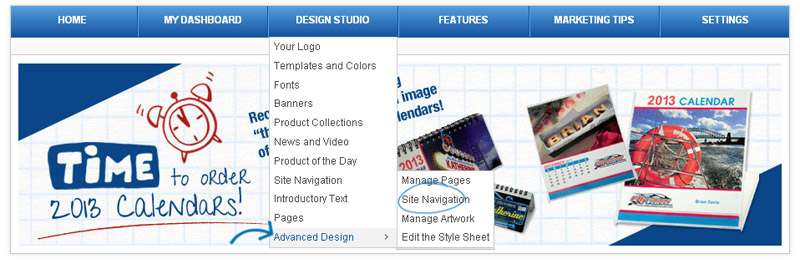
To add navigation menus for use on your site, hover on Advanced Design in the Design Studio menu and then click on Site Navigation.
-

-
The Site Navigation area in the Advanced Design section is where you can build a new navigation menu, as well as edit or delete existing navigation menus.
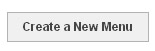
To create a New Menu, click on the "Create a New Menu" button.
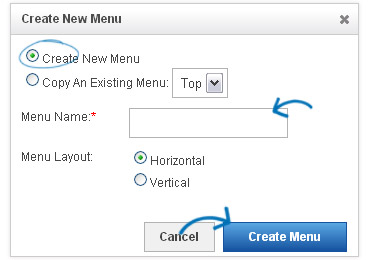
Then, configure the new menu by:
- Selecting whether you want to create a new menu or copy an existing one.
- Naming the menu (ex: Side).
- Selecting whether you would like this menu to be horizontal or vertical.
- Clicking on the "Create Menu" button when you are finished.
-

-
Adding Menu Items
Now, begin building your menu by clicking on the Add button in the Menu section on the left.
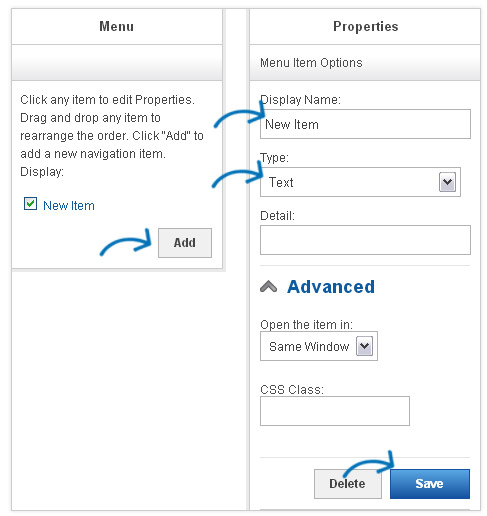
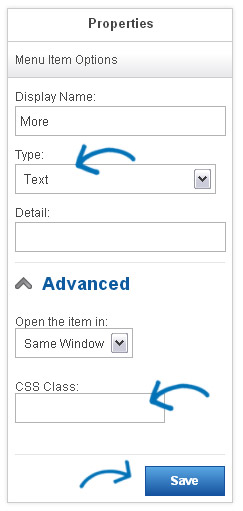
For more detailed information about the options and features available in the Menu Properties box click here.
When you are finished editing this menu item, click on Save.

-
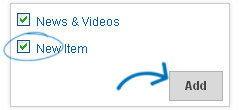
The navigation found below the Advanced options area of the Properties box, is the dropdown menu associated with its parent link. For example, when I chose "More" from the Menu, on my live site when I hover over More I will see News & Videos. Click here to take a look.
Add a New Menu Item
If you would like to add a new link to this submenu, in the lower section of the Properties area, click on the Add button.
A second Properties window will be displayed with the "Navigation Item Options"
Multiple Submenus
If you wanted to add another menu item below the new Navigation Item, you can use the Add button in the lower portion of the Properties window.
Below is an example of how a menu item with sub menus would appear in the Advanced Site Navigation area. In the example below, Stress Relievers is first, then Medical, then Doctors, Nurses, Health and Fitness.
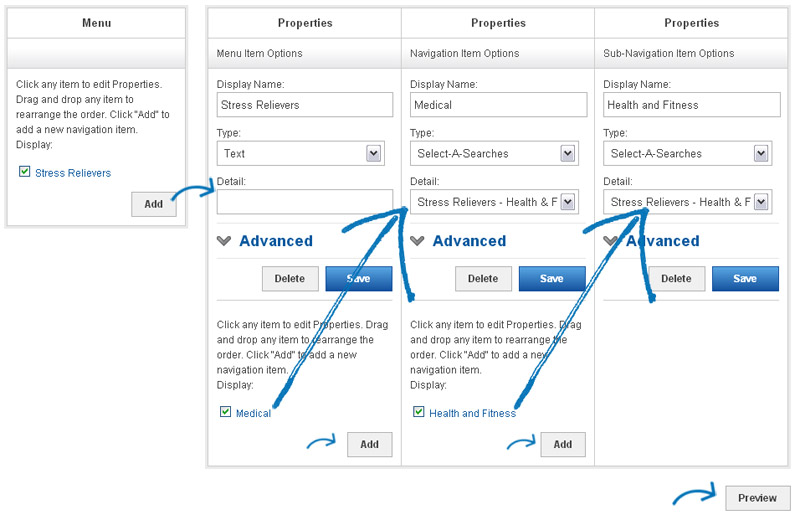
Therefore, then the site navigation menu is:
Stress Releivers > Medical > Health and Fitness
To make a menu item inactive, just uncheck it.
There are two preview buttons; both will display a preview of your menu. If you are satisfied with your site navigation, go to the Advanced Design, Manage Pages section and add the Navigation module to a zone on your site. For more information on how to do this, please review the Design Studio – Advanced Design: Managing Pages Quick Step Guide.