ESP Website Settings: eCommerce
In this quick step guide you will learn about accepting payment on your site.
-

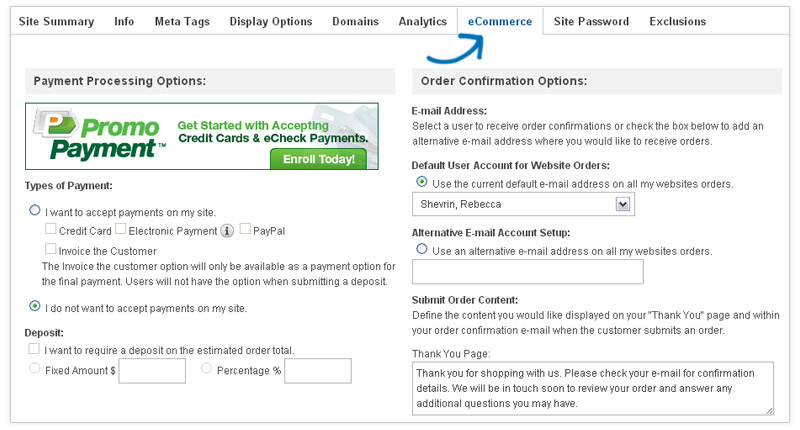
To access site settings, log into your ESP Website™ admin. Then, select your site from the ESP Websites dropdown menu and click on "Settings" from the Management toolbar.

PromoPayment
If you would like to accept credit card and e-check payments you must have a PromoPayment Account. To sign-up for PromoPayment, click on the "Enroll Today" banner in the Payment Processing Center and create a PromoPayment account.

You can also contact PromoPayment by logging onto www.asicentral.com/promopayment, or calling (800) 220-8611. After you set up your PromoPayment account you will receive a security key.
-

What's Covered:
-
Payment Processing Options
Types of Payment
After you have received your key from PromoPayment, return to the "eCommerce" tab and select "I Want to Accept Payments on My Site". Check the "Credit Card" and "Electronic Payment" boxes.
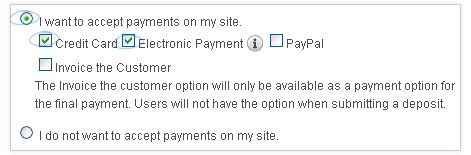
- Note: Paypal will not function properly if you frame (iframe) your website
Deposit:
Next, enable deposits and add a dollar amount or percentage in the deposit field.
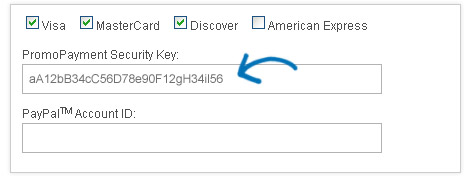
Credit Card Setup
Lastly, select which credit cards you accept and enter or paste in your PromoPayment Security Key.
-
Other Charge Options
In the Other Charge Options section, you can set shipping charges and sales tax to be applied at checkout.
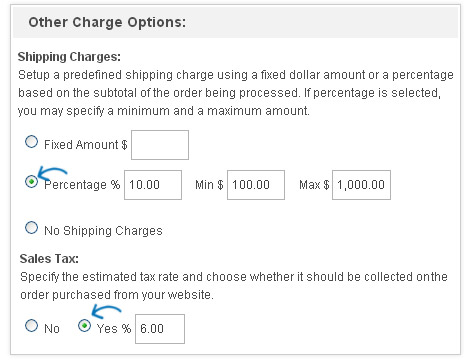
To enable your shipping charge method, select from:
- Fixed Amount (flat rate)
- Percentage
- No Shipping Charges
Then, enter the value in the respective box.
If you are entering a percentage, the Min and Max are the amount of the order to which the percentage should be applied.
For example, a 10% shipping charge will apply to all orders totaling $100 to $1000 dollars.
To enable sales tax, select yes and enter the percentage.
-

Order Confirmation Options, is where you can edit the text of the outgoing order confirmation emails
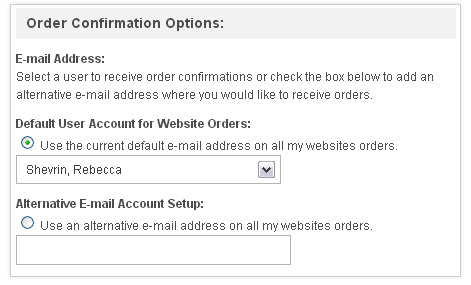
E-Mail
You can also select to which user account you would like orders placed through your ESP Website to go.
You can select a user to receive order confirmations or allow an alternate email address to receive order confirmations.
For example, if your company had a central order manager, you could enter their email address in the Alternative E-mail Account Setup box.
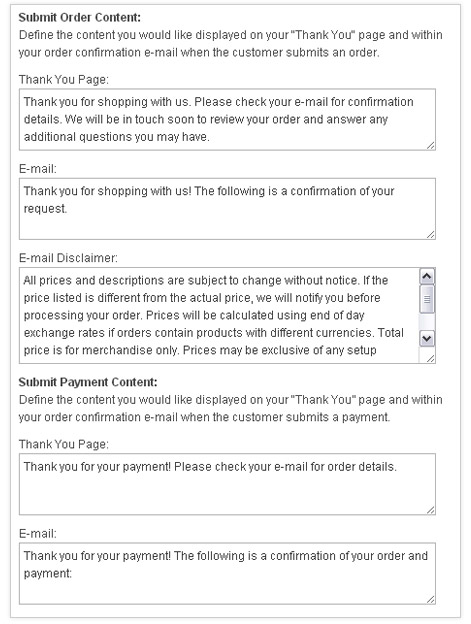
Submit Order Content
The Submit Order Content section is where you can edit the text that is shown on confirmation emails. The Thank You Page text will be displayed as a web page after your customer has completed checkout.
The E-mail text will be included in the email that is sent to your customer after they have placed an order through your ESP Website.
The E-mail Disclaimer text is also included in the order confirmation email.
- Note: Your ESP Website will automatically have standard, default text available in these fields.
The Submit Payment Content is the page and e-mail that are generated after your customer has entered a payment.
The Thank You Page text will be displayed as a web page after your customer has completed their payment.
The E-mail text will be included in the email that is sent to your customer after they have completed making their payment.
-

The next section, Coupons & Points Options is where you can choose to accept coupons or create company points.
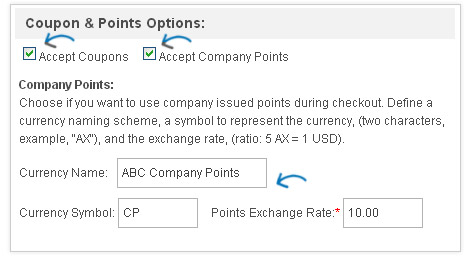
To enable coupons, select "Accept Coupons" to enable this option. For more information on setting up Coupons, please review the Features – Coupons section.
To enable company points, select "Accept Company Points". Then, choose a name for this reward program in the given field and define a two letter abbreviate for the points title (example: Company Points = CP).
You will need to set a ratio for points based on a $1 (USD). For example, if 1 point equals $1, type "1" into the Points Exchange Rate box or if 5 point equals $1, type "5" into the Points Exchange Rate box.

In this section, you can choose to enable artwork so customers can upload their artwork or use approved artwork.
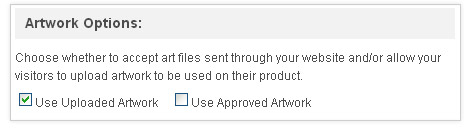
The "use uploaded artwork" option would enable customers to import their logo to the order.
If you are entering a percentage, the Min and Max are the amount of the order to which the percentage should be applied.
The "use approved artwork" option would only allow logos that are currently uploaded to your site to be used.
When you are finished making changes in any section of the eCommerce tab, click on the Save button.