ESPWeb: Presentations, Full Customization
This guide will demonstrate how to create and customize a new presentation using ESPWeb. To begin, use the menu below.
-

Create a new presentation by clicking on Create New Presentation in the Application Toolbar.

-
 Make your selections:
- Note: If you did not have the customer created yet, you can click on the New Customer link and create one.
- Similarly, if you did not have a project folder available for this presentation yet, click on the Create New link and create one.
-

You now have the option to add products to your presentation.
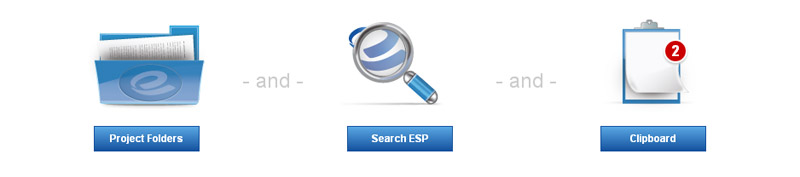
Click on the Project folders button and then click on the folder in which the product is located. All of the products will be displayed.
Click on the Add to Presentation button for each product you would like to include in the presentation.Click on the Search ESP button and then use the Quick Search and Guided Navigation to locate the product.
Click on the Add to Presentation button for each product you would like to include in the presentation.Click on the Clipboard button and then click on the Add to Presentation button for each product you would like to include in the presentation.
-

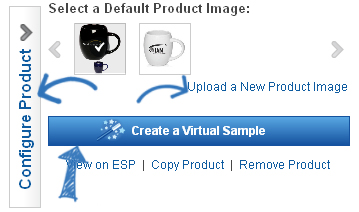
In the Edit Products area, will see each product in your presentation. Hover on the product thumbnail, click on the Select Product link and it will open in an editable state.
Next to each data field, there is a Show/Hide link and an Edit link. The Show/Hide link enables you to select which fields you would like to have displayed. The Edit link will open the field in a completely editable state.

The "Upload a New Product Image" link will enable you to upload your own image to use for the product. You can browse your computer or drag and drop image files to replace the product image.
Below the image is the Create a Virtual Sample button for all virtual sample ready products.
If the product has configurable options, such as multiple price grids or images, there will be a configure product pop out to tailor the product's information to exactly what you need.
The last section on the page includes the pricing information for the product.
Each available price grid will be shown for the product. You can click on Hide to not show any pricing information or can change pricing in the editable grid. If you make pricing changes, click on Save.
-

The Price Calculator tab is where you can adjust the list prices based for all or selected products. You can adjust them based on a profit margin or by a specific amount.
You can add or subtract - a percentage or a fixed amount - to or from the list price or the net cost. You can also choose to have the prices round up to 2 decimal places instead of three. When you are finished, click on the Apply button to make our changes apply to all products.
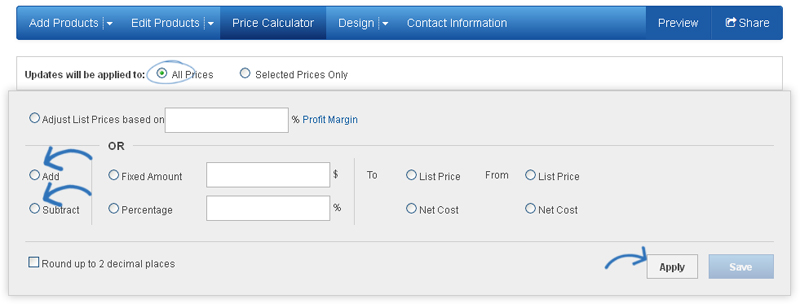
If you wanted to reset the products to the supplier's list price, you could just click on the Update All Products to Current ESP Price link.
All of the products in the presentation are available and you can update the pricing individually by typing list price values into the product's editable price grid. If you edit the pricing for the product, click on Save.
-

What's Covered:
-
 Theme & Layout
In the Theme & Layout tab, you can select the layout style: portrait or landscape.
After selecting the layout style, you can scroll the themes that are available by hovering on the arrows to the left and right of the theme thumbnails. After locating the theme you would like to work with, click on the color swatch below it.
-
Header & Footer Layout
In the next sections, you can select the Header and Footer Layouts. In the Header Layout section, you can incorporate your logo into the header of the presentation. Use the "Select from Image Library" to use a logo from the Media Manager.
You can use the Layout dropdown to select how you would like your logo and contact information to be shown.
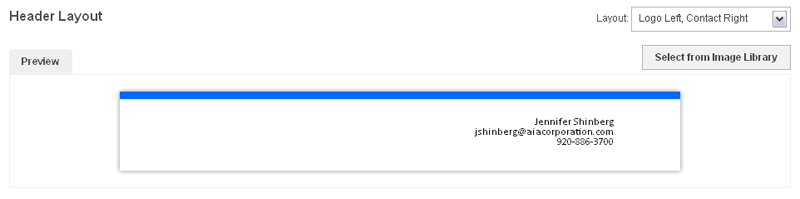
- Note: To change the contact information on the header, go to the Contact Information section.
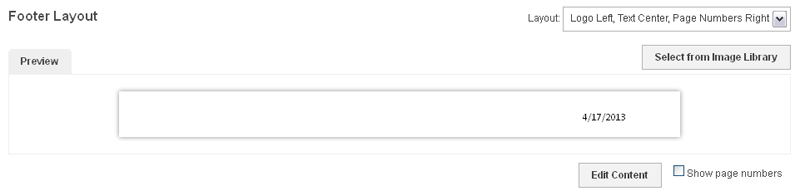
In the Footer Layout section, you can incorporate your logo into the footer of the presentation. Use the "Select from Image Library" to use a logo from the Media Manager.
You can use the Layout dropdown to select how you would like the footer to be displayed. Use the Edit Content button to customize the footer to display text, such as your web address. Check the Show page numbers box to add page numbers to your presentation.
-
Product Layout
In the next section, Presentation Layout, select from:
- 1 product per page with a large image
- 1 product per page with more details
- 2 products per page
- 3 products per page
The data fields that are the standard for each template are displayed below each layout.
- Apply a Virtual Sample
The Create a Virtual Sample tab enables you to create a virtual sample using a logo from your logo library or with text for all virtual sample enabled images in the presentations.
If you select "Virtual Sample ready product image with Logo from my Logo Library, you can click on the "Select from Image Library" button.
 Click here to see a demo of how to create a blank image. Click here to see a demo of how to use text.
For more information about how to create a virtual sample, click here.
- Show & Hide Fields
In this section, you will see a preview of the product layout you selected. You can select which fields you would like to show by marking them. If you wanted to, you can click on the Reset to Default Fields button. You can also check the "Set As Default" to have the fields you selected automatically applied to all presentations from this point on.
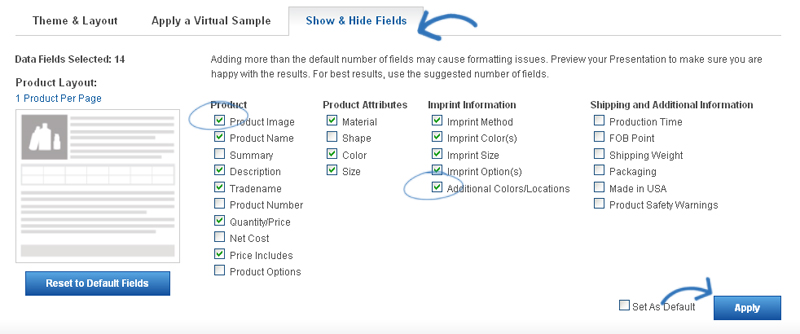
- Note: Adding more than the default number of fields may cause formatting issues.
After you have made your selections, click on Apply.
-

What's Covered:
-
Presentations Details
The Presentation Details area contains the presentation title, customer name and your contact information.
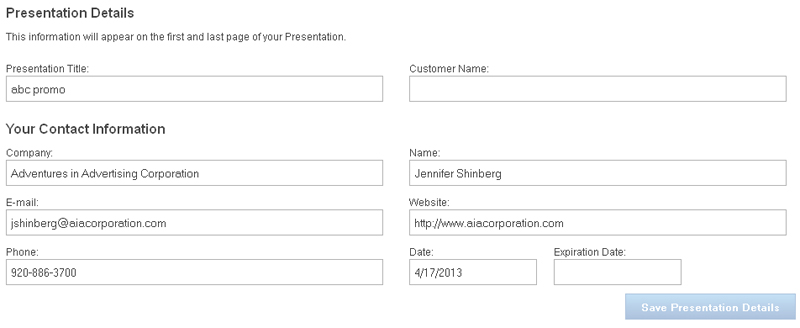
- Note: Saving the presentation details will automatically update the Header in the Design section.
-
Cover & Contact Pages
Below the Presentations Details section are the Cover Page and Contact Page. You can add images to these pages by clicking on the "Select from Image Library" button. If you do not wish to include these pages within your presentation, uncheck the "Show Cover Page" and "Show Contact Page" checkboxes.

-
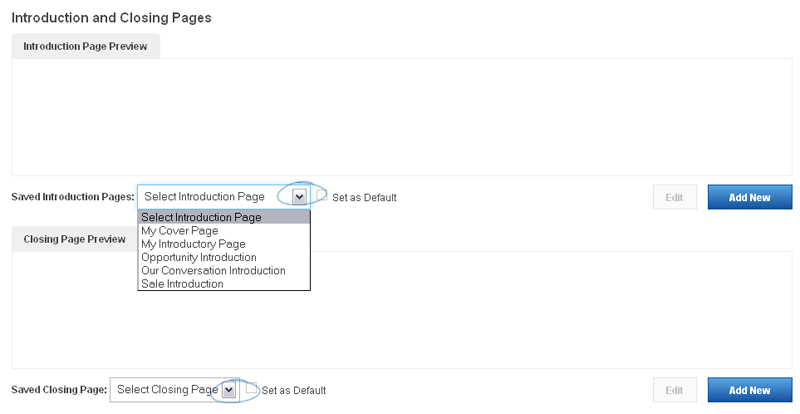
Introduction & Closing Pages
You can select an introduction page and closing page by using the dropdown. You can edit this information by clicking on the edit button below the available preview boxes. You can also create a new one using the Add New button.
If you do not want an Introduction or Closing page, use Select Introduction Page and Select Closing Page from the drop down menus.
-

What's Covered:
-
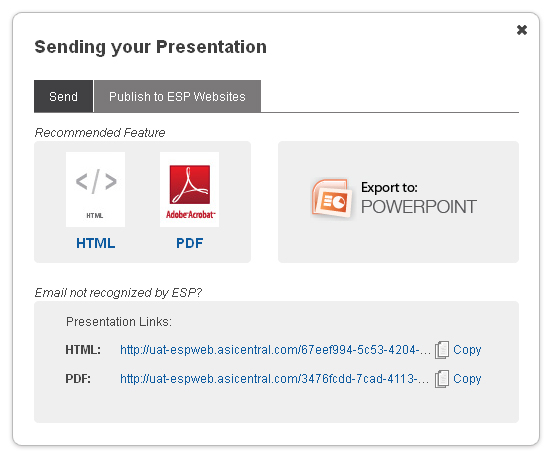
The last button on the Presentations Toolbar is the Share button.

This will open a window that displays your sending and sharing options.
-
HTML & PDF
If you are using a program based email, such as Microsoft Office Outlook or Outlook Express, you can send as a link to a PDF or HTML link
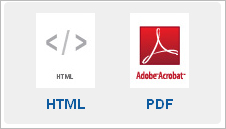
Click on the corresponding icon to send in the format you wish. ESP Web will make a call to your default mail program and then display the e-mail.
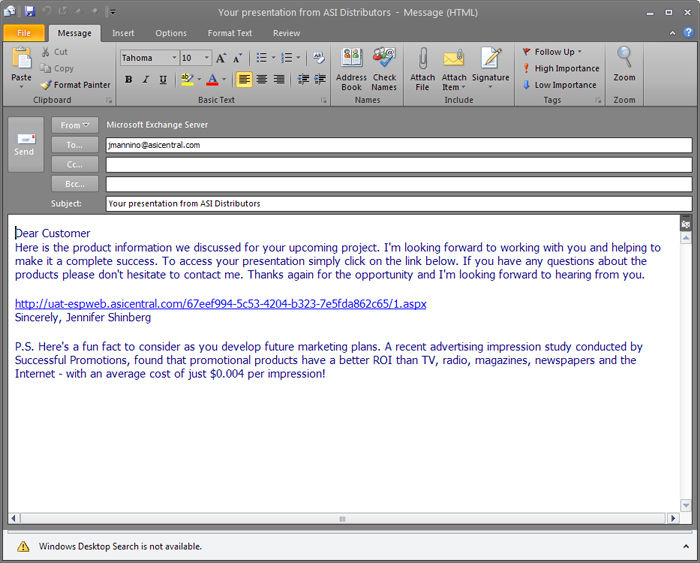
The body of the email will contain a link to the presentation. When your customer receives the email, they will click on the link to view the presentation in the file type you selected.
If you had a web based email such as Yahoo or Gmail, you could simply click on the copy option in the Presentations Links section and paste it into our e-mail. Once the presentation link is in our email, you can just type our client's email in the To field and our presentation is on its way!
To send a presentation as a PDF attachment, just click on the PDF link in the Presentation Links section. Then, save it onto your computer, attach it into an email and send.
-
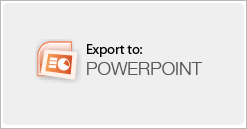
Powerpoint
Export to PowerPoint offers you the ability to completely personalize your presentation. You can just click on this button and your presentation opens in PowerPoint.
The following versions of PowerPoint are supported by ESP Presentations:
Windows:
- PowerPoint 2007
- PowerPoint 2010
- PowerPoint 2013
Mac OS X:
- PowerPoint for Mac 2011 14.2.0
- PowerPoint for Mac 2011 14.3.2
- Publish to ESP Websites
You can also publish this presentation to your ESP Website. Click on the "Publish to: ESP Websites" tab.
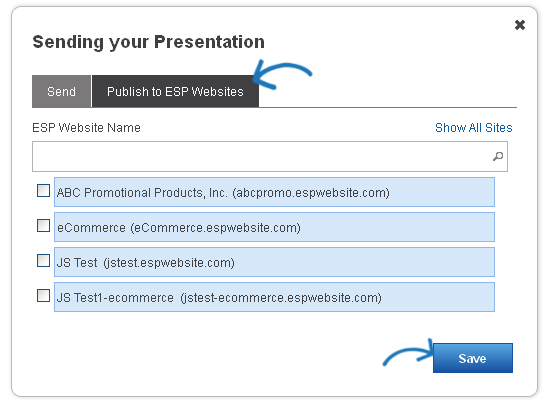
In this tab, you can select to which ESP Website (or Company Store) you would like to publish the presentation.
Check the box that corresponds with the site you would like to which you would like to publish this presentation. Send the link to your customer, to view the presentation on your website and even order the products they are interested in.
After making your selection, click Save.